How to debug an analyzer
Once you’ve created your VSIX project make sure it is set as the default start up project by right clicking it and chosing the option Set as StartUp Project. Also go to the VSIX project’s properties and confirm that the Debug tab has the following:
- Under Start action the option to Start external program should be selected and the location should be where you have installed visual studio. Something like C:/Program Files (x86)/Microsoft Visual Studio/2017/Enterprise/Common7/IDE/devenv.exe.
- Under Start options the Command line arguments should be set to /rootsuffix Exp. See Devenv command-line switches for more info.
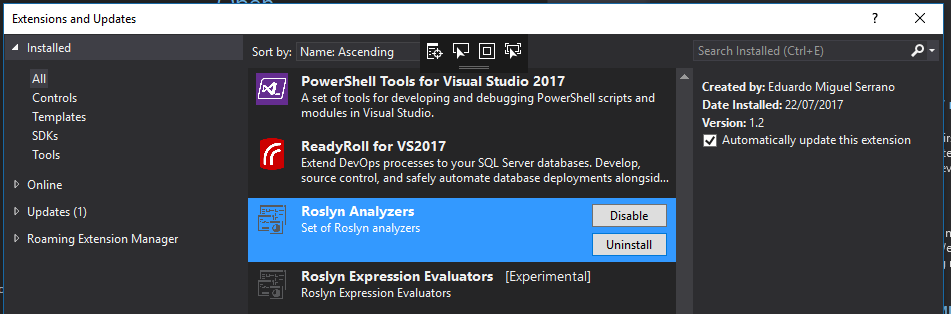
Once you’ve done this Start Debugging on Visual Studio which will launch the experimental version of Visual Studio. To confirm that your VSIX project with your analyzers is installed in this experimental version of Visual Studio go to Tools->Extensions and Updates and in the Installed extensions you will find the VSIX project that you launched. The Name and Description set in the source.extension.vsixmanifest file of the VSIX project will show up in the list.
Now all you need to do is create a new solution to test your analyzer. Simply create a new project of the type of your chosing and add a code that should trigger the analyzer.
You can put breakpoints on the Visual Studio that has your analyzer code because it is debugging the experimental version of visual studio. If your breakpoints are not working see:
- Check the version of your nugets.
- Resetting your experimental version of Visual Studio .
Resetting your experimental version of Visual Studio
If you’re not careful with the ids and versions of your VSIX projects that you deploy onto the experimental version of Visual Studio you might get into a place where you can not debug properly because the VSIX fails to be installed. If you think you’re in that position you should either:
- Be patient: depending on your computer it might take some seconds for the analyzers and code fixes to show up.
- Update the version of the VSIX: double click the source.extension.vsixmanifest and change the version number on the top right corner.
- Launch a different experimental instance of Visual Studio: In the Command line arguments instead of “/rootsuffix Exp” change the word Exp to anything else you would like, for instance “/rootsuffix Exp2” and a new experimental version of Visual Studio will be launched. Each time you chose a new word a new experimental isntance is launched and unless you reset them they remember the VSIX that were deployed to them.
- Reset your experimental instance: for that you will need to use the CreateExpInstance utility. For Visual Studio 2017 you can find this utility at C:/Program Files (x86)/Microsoft Visual Studio/2017/Enterprise/VSSDK/VisualStudioIntegration/Tools/Bin.
- Manualy reset the experimental instance: for Visual Studio 2017 what the utility does is the same as deleting a couple of folders from %localappdata%/Microsoft/VisualStudio. For instance if the parameter after /rootsuffix is Exp then Visual Studio 2017 creates two directories at that location with the following names: Exp and 15.0_18f5488bExp. In the latter folder the numbers between the underscore and the word Exp may vary. If you close all instances of Visual Studio and delete those two folder you’ve reset the experimental version of Visual Studio with the id Exp. If you’re using another parameter after /rootsuffix like Roslyn then the two folders would be somehting like: Roslyn and 15.0_18f5488bRoslyn.
- Maybe the VSIX is installed properly: if none of the above worked check your nuget packages version